Friday, 14 February 2014

February Tag

Hi Everyone,

I have just finished my February Tag well ahead of time for once and it being Valentines day today, I thought it would be a good time to showcase it.  Most of the techniques are as Tim did in his excellent tutorial which you can view Here .

 Mine differs in a few ways the first being the colour.  I love seedless Preserve and as you can see I have used this as the main ingredient for my tag.  I mixed the background up a little by having the hearts lighter than the surround (a mix of Milled Lavender and Frayed Burlap, clear embossed and then Seedless Preserve DI rubbed over the edges.


Like Tim I have used the Chalkboard technique for blackboard at the back, and mounted a heart onto it cut originally from corrugated cardboard torn back a little, painted with Distress Paints and then a few dabs of glossy accents over parts of it and sprinkled with Seedless Preserve Distress Glitter. I just love the way we have all these Ranger products now in all the colours and they all blend so well.

I used the chalkboard technique again for the Tiny Phrases sentiment.

I wanted to put a couple of little kisses onto the tag and found this little xoxo amongst the chit chat stickers which with a little DI fitted into the bottom corner of the blackboard perfectly without it being to loud. 


I don't yet have any industrial stickers in my stash so I used metal tape onto card and ran it through used the Vintage Lace decorative strip to create a border.   I used Distress Paint onto a word band and rubbed it back with a wet wipe so the words matched the project, and this was attached using my tiny attacher.
 

The heart charm was from my stash, I filled it with glossy accents and sprinkled distress glitter onto it, let it dry and then used distress paint to colour some linen ribbon.  Can you guess where the 14 came from ??
 
 
It was one of the little numbers from the Tim's Remnant Rubs backed onto a tiny square of self adhesive linen.

 
Now if you tuned into my tag last month you may remember that I had decided to do a little atc to go with each tag so I could display it in my wall unit which Anne bought me last year, so here is my little February atc together the one I did in January.
 
 
So there we are, I hope you all have enjoy lovely Valentines evening   with those who are very special to you.  Thank you as always for visiting and your very lovely comments.
Hugs Mo xx  


Sunday, 9 February 2014

Giant Flowers, Friends & Fun

Hi Everyone,
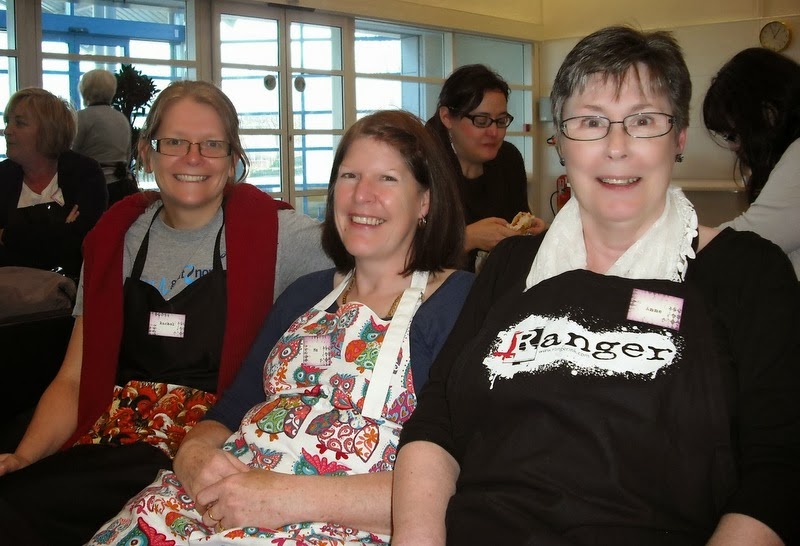
As some of you already know I was on a weekend retreat with Hels Sheridan last weekend superbly organised by Sue Tucker and accompanied by my lovely best friend Anne.  I think I may well be the last of 19 ladies to post what we got up to as other things have taken priority and before I knew it I am a week behind! (where does time go too?). 
On Saturday we made this lovely canvas using a paper piece technique and as usual, Hels gave us plenty of embellies and die cuts to play with.
 
 The leaves are die-cut from the new Bigz Spring Greens die, and the flowers are of course a mix of tattered florals.  The big one in the middle is the largest one from the new Bigs xl die and you can see how big it is nestled in-between 2 of the normal size ones from the Bigz die.  Here they are before I spritzed them, they look like porcelain on the picture, aren't they just lovely.  
 I love this little Wendi Vecchi Buzzy Bee and the mix of cogs and buttons (can you see a Unicorn??)

 You can see the gold embossing paste black stamping and my black spritzing better on  the photo below.  Hels made each of us a little UTEE birdie in her melt pot, we highlighted this and a few of the die-cuts with treasure gold.
 
In the pictures below you can see Diane signing her autograph on the back of her canvas and blog friend Rachel smiling for the Camera.  
 
 
Anne on the other hand seemed focused on her flowers and the Cosmic Shimmer

 
I look completely chilled in-between Anne and Rachel during our lunch break
 
 
 Here is everyone showing off our handiwork from Saturday
 

 Sunday saw us with another lovely project made from a master Board with embossing paste, inks and die cuts
 
This close up photo shows the detail of the inked flowers, stamped and coloured butterflies and  sentiments, 
 
We had a lovely weekend and it went so quickly, We are now looking forward to the next one.
Thank you everyone for visiting
Hugs Mo x 


Thursday, 30 January 2014

Just The Two Of Us x

 
Hi Everyone,
 
I am so excited and honoured to have been asked to be Guest Designer for the fantastic challenge blog Frilly and Funkie this month and design a project for their current challenge which has the theme Valentines day with a twist the twist being  there can be no hearts! colours to be used are the traditional red, white, and pink.  I had to really use the old grey matter on this project, and I  was thinking of what was going on in my head when I thought of Valentines day and my DH. 
We are going to celebrate our 30th (Pearl) Wedding anniversary this year so wanted pearls to feature somewhere, we both love birds, and as we have never been blessed with children, it is just the two of us hence the title for this piece.
 
 
 This is quite a picture heavy post as I have done a step by step so you could have a go at something similar. I must apologise for the quality of some of the photos, I was making up the project last week and the days were very dark so getting a good photo was difficult to say the least.  By the time the project was finished, the sun came out for 5 minutes so the completed pictures are much brighter.  Please click on the photos for a closer look.  I have done it as a small wall hanger but it could be adapted to a card quite easily so here we go.
 
 First Distress card with Victorian Velvet DI, then stamp over this with Maroon Archival Ink.


I wanted another layer and saw a brilliant detailed video by the very talented Jenny (Buttons) on how to colour your texture paste  with archival re-inkers check it out HERE.  I have not got any archival re-inkers so I just dabbed my pad onto the craft sheet and mixed some texture paste into it.  I don't think you can get the intensity of colour that Jenny did on the video, but it gave me a soft subtle pink I needed for this project.
Remember to tape down your stencil over the card so it doesn't slip
(the more observant of you will notice I took the photo before stamping the card).


 The effect is lovely don't you think?

 Next I took a small canvas and went around the edges with Victorian Velvet distress stain (about an inch in from the edge), I placed the Tim Holtz Bubbles stencil over it to texture the coloured edges  this time keeping the embossing paste white.  When dry, I went around the very edges of the card and the canvas with Festive Berries distress paint to give it a tiny border

The Card was then layered onto the canvas. I punched two holes in the top of the canvas with a cropadile and added eyelets for a ribbon.

I cut 2 die cuts from the Ornate Frames Bigz die. The first one was embossed with Aged Rose Frantage embossing enamel  and the second one was painted with Festive Berries Distress Paint.  
 

I also painted the centre oval from one of the frames and an on the edge doily again with Festive Berries, and then stamped over with Maroon archival using the Indigo Blu baroque bauble.  The frames were layered up slightly offset, and the doily attached to the base.


 All these elements were then mounted onto the base and adhesive pearls were added
 

 The birds came from a Creatables die (I think its called Winter Birds) and these were given a coat of distress crackle Rock Candy.  The edges of the birds were inked with a little weathered wood DI to give a shading.

I took some copy paper and smooched it through some distress stains on a craft mat to get some colour onto it, the when dry, die cut flower swirls (I only needed 3 but I got a bit carried away cutting as many as I could to use on later projects).

 
Using a quilling tool, I curled them up and gently curled each petal back 


Gluing 3 together onto a small punched circle of card.
  

 I die cut a couple of leaves and added some glossy accents raindrops onto the roses
 
 
My cricut came to the rescue again for the sentiment, together with a couple of chit chat stickers, and I threaded an organza ribbon through the eyelets for the hanger, with matching bow and pearl drop


 I would like to thank everyone who has dropped by to have a closer look at my Valentine hanger and hope it has inspired a few of you to have a go  with some of the techniques.
 
If you haven't already done so, pop over to the Frilly and Funkie  blog to see the inspirational projects the design team have made.  Do join in the challenge if you can, they want to see vintage or shabby chic projects in the traditional red, pink and white but remember
 the twist is that there can be no hearts.  If you are chosen as our winner by the team, like me, you could be invited to be the next Guest Designer. There is also the chance to win a $25 shopping spree at The Funkie Junkie Boutique for one lucky entrant chosen at random.
 
Hugs Mo x


Monday, 20 January 2014

January Tag

Hi Everyone,
I am so proud & excited to announce my win over at Frilly and Funkie with their New Years Resolutions Challenge with my 'Follow Your Heart' Canvas.  If you missed it catch it Here.
Time now though to show my January Tag entry for Tim Holtz tags of 2014, and wow did Timmy have us working hard with techniques with this one.

 I wont go into great detail as to how I did this tag as it is pretty close to Tim's who gives a very detailed step by step Here. I changed one or two details as I didn't have the little charm Tim used on the top of his tag.  I was going to put the month and year onto the back of the bulb but it didn't quite fit, then I remembered I had some of these little metal tags and it fitted on this perfectly
 
I am happy with the way the numbers distressed with sanding back, but I think I need a bit more practise with the paint splatters!  trouble is once they're on, they're on so I had to live with it or risk spoiling the lovely stencilling underneath..
 
The wording is just what was in my head as I put the tag together.  Below you will see a little bonus atc to match the tag.  Throughout 2014 each time I do my tag I will be making a little atc to match  
 
My lovely friend Anne bought me this wall mounted atc holder for my birthday last year and up till now it has housed various atcs I have made when Mr Mojo has done a runner.  I thought it would be nice to give it more of a purpose, so throughout 2014, every time I make my tag It will be accompanied with a matching atc.  It looks a little empty now, but I think it will look great later in the year as it starts to fill up. 

 
Thank you as always for taking the time to visit my blog, I hope you enjoy.
Hugs Mo x 


Tuesday, 14 January 2014

Follow Your Heart

Hello Everyone,
A very warm welcome to you if you have popped on to my little blog for a look at what I have been up to.  I have just about come down to earth again now after my winning Linda's 12 Tags of Christmas Challenge over at The Funkie Junkie 'Whoop! Whoop!' and  I have now been inspired to enter more challenges this year.  This being one of my New Years Resolutions, brings me nicely onto Frilly & Funkie who have this as the title of their current challenge and my entry called Follow Your Heart.
 Sometimes I feel when you are constantly up against deadlines and having to deal with restrictions in products, costs or time, it can be so easy to loose focus on where we really want to be in our Crafty world, and what aspects of it we enjoy most.  I have done quite a few projects last year which maybe are not a true reflection of my style, so this year I want to concentrate on projects that I feel are right for me and I am happy doing.  I love Mixed Media so that is where I have started. 
 This is an 8 x 8 Canvas and I started with texture paste through the Art Is stencil and one of Tim's 'measured'.  To this I added a few die cuts I had lying around 
 More die-cuts lace and flowers were added
 Followed by a few buttons trinkets paper clips and the wording which was cut with my cricut as I needed them small enough to fit and all my dies were too big.
 A couple of layers of Gesso and left to dry, then I spritzed with quite a few different sprays, (I wish I had taken a picture of my desk because it matched the canvas lol) I got completely wrapped up in what I was doing and forgot my camera at this point sorry!  I gave it a blast with the heat gun till it was completely dry.  Finally I painted in the lettering as I wanted them to pop out, and then the textures all got a brushing of treasure gold to show up the detail. 
 Here are a few close up piccies that shows the detail off better

 I loved doing this Canvas and that's what it is all about.
Thank you for taking the time to visit and do pop over to Frilly & Funkie for inspiration and to see the other wonderful entries to this challenge.
Hugs Mo x

Tuesday, 7 January 2014

Bonus tag 2 done!

Hi Everyone

Back again with my second Thank you card as inspired by Linda Coughlin's  bonus tags that she kindly posted for us as a follow on of  her fantastic 12 tags of Christmas Challenge click HERE for the details of the challenge.  Please also click HERE to see Linda's Tag 2 which has inspired my post today. As with my 1st Thank you card on my last post, I have stayed with the style of fold that Linda did with her Jumbo tag  to make a little card.  
 The first step was to colour the card with Frayed Burlap D.I.
 
I decided to emboss the front of this card with 2 folders I have had for such a long time I cant even remember the name of them.  I used Burlap DI over the embossing to show up the pattern better.   I have used the paper clip as a closure again, this time with a small die cut bird onto a punched circle both cut from Kraft card.    
 
A small strip of real Burlap was added to the small top edge and frayed back a little to soften the effect.  The Tim Holtz Burlap stencil was used on the back and around the front to get the effect shown in the picture above.  Below you can see the inside which has had the Rays Stencil used on it with the simple sayings Thank you sentiment on top of a piece of muslin.  The extra page on the left is held in place with the twine which wraps around and ties on the front of the card, this gives me more space to write a note to the recipient.

The 12 Tags Challenge is sponsored by the Funkie Junkie Boutique and is offering discounts for all who enter and comply by the rules, please click Here to take a look for yourself at what this lovely on line shop has to offer.

I have had great fun completing all the tags and cards for this challenge, and I would like to say a big Thank you to Linda for the inspiration she has given myself and others.  Thank you to all who have followed me and for your lovely comments.
Hugs Mo x