Welcome back for part 2 of my Spring Canvas Click here for Part 1 which shows you how I made up the background. After a little more playing and tweaking and adding of bits and pieces from my stash now looks like this...

The little wooden butterflies were part of a wonderful thank you gift of die-cuts and wood parts I received from Julie last year. The butterflies have been covered with three different colours of Stampendous embossing enamel and had rusty look wire wrapped around them for bodies and antenna. I then gave them a cheesecloth butterfly trail.
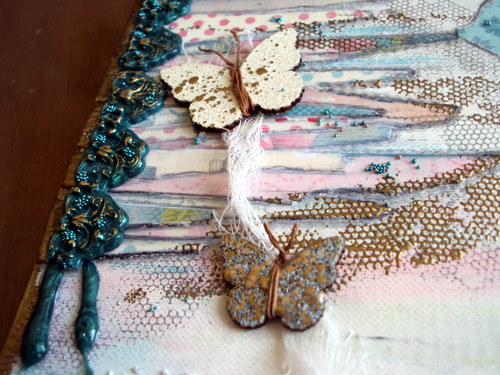
Here you can see a close up of the UTEE dribbles and a few seed beads to continue them down the canvas

This lovely wooden tree was a bargain purchase from The Works a couple of years ago, I can't believe I haven't used it until now. I decided to keep it natural so I could still see the colours underneath, however I wanted also to give it some lift and added texture. I had a little play and settled for the wire I had used on the butterflies wrapped around the tree and a layer of cheesecloth underneath. The flowers started life as a broken down cheap necklace I found in a charity shop, I used the blue embossing enamel to colour them and then used tiny watch parts for the centre. The owl was originally silver and I used treasure gold to colour him to match.

Last week I managed to purchase an Olympia typewriter for £5 and all it need was a new ribbon. A quick look on the Internet and I found a shop that supplies all types of Typewriter ribbons, I gave them a call and had my ribbon the next day! that's service for you. The wording was copied from my dictionary with the typewriter and added to another piece of matching paper. The buttons were already in the paper design.

This little Peacock was one I got when I did attended a workshop with Hels Sheriden a couple of years ago, I used one on that Canvas too, you can see my post for that one HERE. The Peacock was easy to bend so I could make it sit on the moulding.

I brought the Cheesecloth under the Peacock to tie it in a little with its background.

A few more seed beads and embossed dribbles at the base of the tree

And a final look at the completed Canvas which is now displayed on my Craft room wall, it makes me smile when I look at it, I hope you enjoyed seeing it too.

Thank you for dropping by today, Happy Crafting everyone
Mo x
Wow, what a beautiful canvas Mo. So interesting too with all the pieces you have added to make it your own. Enjoy your weekend. Hugs Rita xxx
ReplyDeleteThis must look so pretty on your Craft Room wall and when the light comes in your window I bet it highlights different areas. A stunning canvas and I love all the little accents of wire.
ReplyDeleteHugs, Julie x
Meant to also say what a great find with your typewriter, lucky you !
ReplyDeleteAbsolutely delightful - I really love the wire-wrapped tree and the effect of the paper strips and bubbles now is great as the landscape for your springtime fantasy land. Love that you have a traditional typewriter to create your vintage sentiments now - lovely!
ReplyDeleteAlison xx
Absolutely wonderful Mo, I love those gorgeous dribbles and the tree looks fabulous with the wire. I am so impressed with your typewriter too, if you find another will you get it for me please? Lol. Hugs, Anne xx
ReplyDeletethis looks fabulous Mo - I love all the details and how you've created a wonderful scene. you're so clever! Hugs Rachel x
ReplyDeleteI'm not surprised that you are smiling! This really is fabulous Mo! I especially love how you used the wire! Hugs, Chrisx
ReplyDeleteWOWZERS! This is gorgeous!
ReplyDeleteWOWZERS! This is gorgeous!
ReplyDelete