Friday 22 April 2016

Guest Design Spot @ AVJ

Hi Everyone,

I am thrilled to be sharing with you today a shadow box that I have made for A Vintage Journey following an invitation from Brenda to do a Guest Design spot for their April challenge.    The theme as chosen by Sandy who is hosting this challenge is "Spring is in the Air" and has described the challenge as follows:-
Leave those winter blues behind. Make anything that says SPRING using pastel colours. It is your choice, a card, canvas, 3D or a tag, etc. but remember it should be in one of the styles that we like to see.
 
 I started by crumpling up some tissue paper and gluing it to the back frame of a canvas using glue and seal and a brush, I let it dry whilst I started the background,
 
I used Postal tissue wrap to cover a piece of card I had already measured and cut to fit the inside of the shadow box
Next I used Cracked Pistachio, Twisted Citron, Fossilised amber and Tumbled glass distress inks as a watercolour to colour the tissue wrap.  I gave it a quick dry brush with gesso and then used Decoart crackled texture paste through two stencils I made from the mixed media 2 thinlets set. 
 I used the bird feather stamp set to stamp the blackbird, you can see on the 2nd photo the difference between using black archival ink and versafine, the versafine one on the top is much clearer.  I used distress crayons to colour the blackbird and  used clear embossing powder to give him a glaze and lift the colours a little.  I also used the next from this stamp set on the background using Potting soil archival.
I stamped a few grasses in the background with a very old Tim Holtz stamp set which you can see below it's called Natures Elements.  I knocked this back a little with watered down gesso as I felt the colours were a bit strong. 

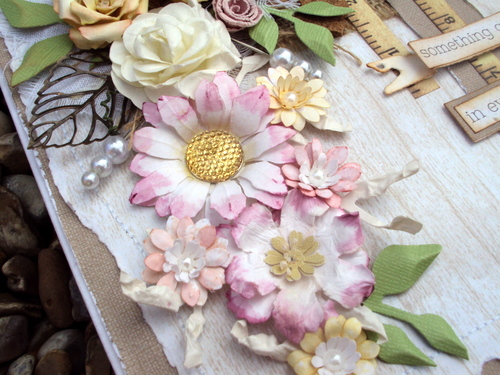
The flowers were die-cut using Watercolour paper and the smallest flower from the Bigz Tattered Florals and then each flower was shaped using a ball tool.  The flower centres were cut using a small flower punch from thin card painted with Shabby Shutters DP.  The stamen were cut down and held in the centre of the flowers with silicone glue, left to dry and then the tips painted with Spiced Marmalade paint. You can see from the photo I had quite a conveyor belt going on with these flowers!  
I used Silicone glue once again to glue them on to a real twig. The nest stamped on the picture below was just on scrap card to give me an idea where to place the flowers. 
I wanted to give a bit more dimension to the stamped nest so I cut a few branches using Autumn gatherings decorative strip and painted them with Walnut Stain DP,  I also used a few on another twig.  Next I die-cut some grasses from green core card using Winter Foliage thinlets, and  some netting using Mixed media set 1 which was then coloured with distress stains.

At this stage I was happy with the background and turned my attention back on to the shadow box frame itself.
A few more distress ink colours and tissue tape made the letters to spell out SPRING and the vintage ribbon was coloured with the same colours to make a bow.
The garden twine was simply wrapped around the frame and secured in the corners with a knot both on the back and on the front.  The bow was added to the top left corner, I made a few eggs for the nest, and a stamped butterfly (Indigo Blu) was added to pick up the blue of the eggs.
 Finally, I used a glue gun to secure the blackbird, twigs and letters.
 Here are a few close up photo's, hope you enjoy


Thank you as always for your visit today.
Mo x


Thursday 21 April 2016

Guest Design for Indigo Blu

Hi Everyone,

Thank you for popping over today. I hope all is well with all of you and that Spring is finally started to show in your Gardens with the new growth and Spring blooms. Which leads me onto today's post.

I was very excited to have been asked by Nikki over at INDIGO BLU to complete a Guest design piece as inspiration for their new challenge theme Spring is in the Air.  As a child my brother and I took part in the annual May Queen festival and I remember we always had our photo taken in front of the Lilac tree in the garden as it was in full bloom in May. For me this theme was great as this gave me a chance to play with yet more new goodies in my collection the Floral Fantasy stamp and 12 x 12 papers, both of which include a lovely lilac branch in the design.


I dry brushed gee so good gesso over a section of the Papers that I had glued onto a piece of mount board cut to A5 size.
 Because I decided I wanted the butterfly to stand out a bit more, I used a damp (not wet) baby wipe to very gently wipe away the gesso
 then to protect it, plus make it pop a bit more I used a Versamarker and clear embossing powder over the butterfly.
 Next I stamped and embossed, butterflies, a sentiment and the Lilac branch from the Floral Fantasy stamp set.  As you can see from the phot below, I mixed Park Lane and Marshmallow to get my lilac, and Farmhouse Teal and Lemon Meringue for my green leaves
 I stamped the doily from the same stamp set onto vellum and embossed with white, I then repeated it on the other side to make a full doily.  You can see at the bottom of the picture the match wasn't quite perfect so I made sure that was covered by the lilac on the project.Vellum is very difficult to stick down onto anything without the glue showing through so to overcome this I backed it with a double sided sticky sheet before cutting it out.
 
 I tore a few strips of floral fantasy papers to give another layer to my stamped elements. 
 
 I used crackle paste on the edges of the hanging to frame it and when dry coloured it with distress stains.  I mounted the whole frame onto another piece of mount board to make it stronger. 
finally I coloured three strands of vintage ribbon and then plaited through metal brads to enable me to hang it up.
 
Here you can see the little sentiment got a bit of the crackle treatment also.  I decided to layer up the two stamped butterflies for dimension.  Th lilac branch was carefully cut out to enable as much of the background to show through as possible. 


If you would like to join in the challenge and have a chance to win a fabulous prize of 
 Indigoblu stamps of your choice and you have 3 options to choose from:

1: 2 Large stamp plates (A5)
or
2: 4 Small stamp plates (A6)
or
3: 1 Large and 2 small plates
I was lucky! maybe you will be too but you have to be in it to win it, so click HERE for the link and all the challenge details.
Mo x


Sunday 17 April 2016

"Spring has Sprung"

Hi Everyone,

I hope you are all well and managing to keep those crafty hands busy. 

Today I want to share with you a canvas I did a while ago now but never got around to posting it on my blog. I thought the canvas would be a fitting entry for the Spring themed challenges currently running over at Country View Crafts and A Vintage Journey.

 The background was made up of two pre-printed papers I had in my stash which I distressed  on the edges and machine stitched them together before gluing on to an A4 canvas.
 All but the two large white roses were hand made by punching and die-cutting watercolour paper, wetting it, scrunching up and colouring with distress inks and paints.
 The green leaves were simply die cut from green core card using the Garden greens die, some white leaves were also added for contrast.  
 The burlap tag was die-cut and here you can also see die-cut cork using the on the edge lattice die.
The sentiment was one of several on the reverse of one of the background papers, as were the rulers (There is a similar page in the new Tim Holtz Dapper papers)
 A couple of dazzlers and pearl beads  for flower centers, pearl hat pins and metal leaves add to the dimension. 

 The tattered banners decorative strip was used to mount the lower part of the sentiment

 
 On the close ups here you can see the detail of the stitching.

Both of these challenges have excellent prizes to be won, for a chance to get your hands on them simply click HERE for the details of Country View Crafts  where the prize this month is a complete set of PaperArtsy Infusions.
Click HERE for the details of A Vintage Journey where the winner will receive a £20 Voucher to spend at Country View Crafts  who are sponsoring AVJ this month.

As always Thank you for your visit today and your lovely comments
Hugs
Mo x


Wednesday 13 April 2016

Yellow, Pink & green @ Indigo Blu

Hi Everyone,

I have been playing in my craft room today with one of the stamps that I was lucky enough to win on the Indigo Blu challenge last month with my Look and you will find card click HERE if you missed it.  Their theme for this month is Yellow Pink & Green click on this link for the details.  I had just  ordered two delicious new paint colours to add to my collection Lemon Meringue Pie, and Marshmallow, so I had a good start and as  I also needed a birthday card for a neighbour who loves her garden this is what I created.

 I started by stamping the rain droplets stamp onto a 13mm square piece of card with VersaMark and  embossed with white embossing powder.  I used a tiny bit of Lemon Meringue Pie watered down and painted over the whole of the card and dried. 
 Next I tore the card into strips before gluing them back down onto another piece of card, overlapping them as I went.
I took the Colour Me Daisy stamp and stamped and embossed as earlier, I was not sure at this stage which colour I was going to use so I did two complete daisies and on a separate piece of card I just stamped all around the edges.   
 I wanted a focal point and spotted the perfect sized piece of patterned paper on the front cover of my 12" x 12" Floral Fantasy paper pad.  I used paint to watercolour over the paper just to yellow it up a little more for this project and  to make the flower pop out more.
 Next I thought about some more green on the card but I only had Peppermint green and this got totally lost amongst the vivid colours of the pink and yellow.  I had a light bulb moment and mixed together Lemon Meringue and Park Lane and bingo a lovely green emerged for my dimensional leaves.
As we look a little closer you can see that I cut up the pink daisy I had stamped earlier into smaller squares.  I saved the yellow one for another project and did another pink one which I used to die-cut the birthday wording).  The fussy cut butterfly was on another panel on the front cover of the paper pad. 


 The leaves are from a spring greens die and I just tucked them under the panel where I thought they could become an extension of the existing leaves on the panel.

 
I hope my neighbour will be happy with it (I hope she likes Pink & Yellow!)
Hugs
Mo x